As a cyclist who spends hours on the roads in and around Lincolnshire, I consider my Garmin Varia an essential safety tool. But let’s be honest: the stock mount it comes with is woefully inadequate. It’s unstable, looks cheap and once you add a saddle bag into the mix, it becomes a genuine problem, causing blocked signals and false alerts.
After my own Varia nearly bounced off into a ditch, I knew there had to be a better way.
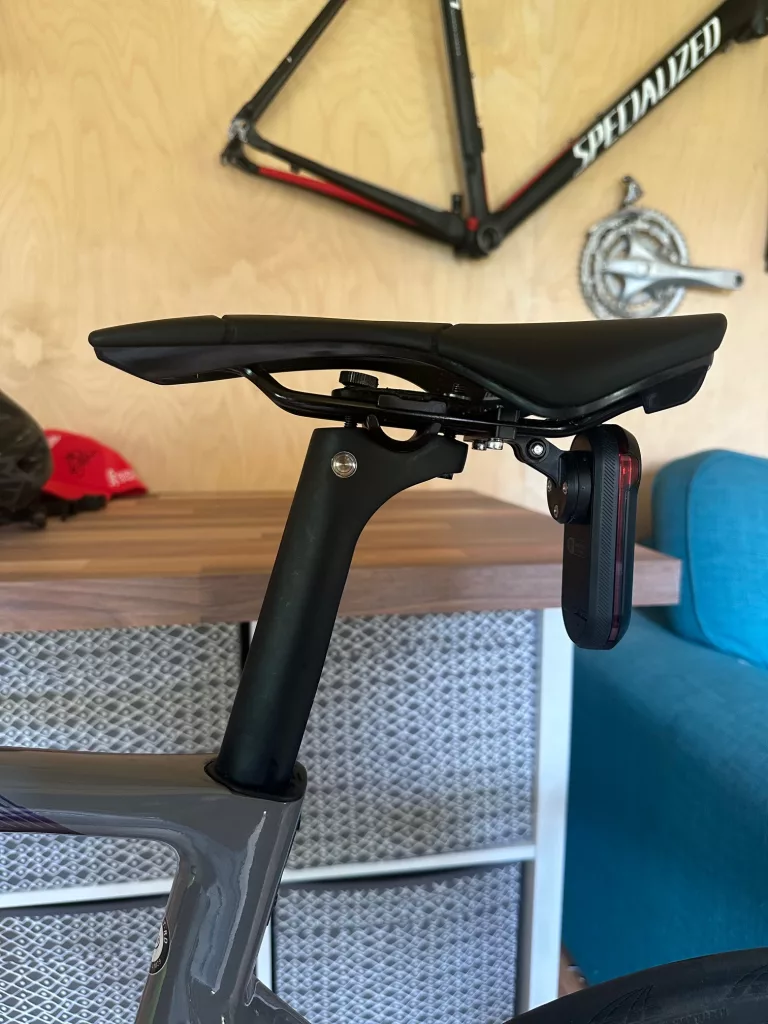
The best solution I’ve found is a dedicated saddle rail mount. It provides a rock solid, secure attachment point that places your Varia in the optimal position – high up, with a clear view of the road.
This guide will not only walk you through the installation but also help you choose the right mount for your bike and needs.
Why a Saddle Mount is the Best Varia Upgrade You Can Make
Before we grab the Allen keys, let’s cover why this is such a critical upgrade.
- Unmatched Stability: Saddle rail mounts bolt directly to your bike’s structure, eliminating the wobble and vibration common with the stock rubber bands. It’s a set and forget solution.
- Perfect Radar Placement: Garmin recommends mounting the Varia between 250mm and 1,200mm above the road for best performance. A saddle mount naturally places the unit in this ideal window for visibility and radar detection.
- Saddle Bag Freedom: This is the number one reason most people switch. A saddle mount moves the Varia up and back, providing ample clearance for almost any saddle bag without blocking the radar or light.
- A Cleaner Look: It creates a much tidier, more integrated look than a rubber band strapped around your seatpost.
How to Choose the Right Saddle Mount
The market is full of options, from budget Amazon finds to premium 3D-printed options. Here’s a quick breakdown:
- Amazon & Mainstream Brands: Brands like Lichifit and Tusita offer excellent, affordable mounts that are often made of durable nylon. They provide a fantastic balance of price and performance and are perfect for most riders. The mount I personally use is a Panmout Radar Bike Saddle Mount from Amazon and it has been flawless.
- Premium & Boutique Brands: Companies like MagCAD and Concentric Cycling offer lightweight, beautifully engineered mounts. These are often 3D printed or CNC machined and appeal to riders looking for the cleanest aesthetic and lowest weight.
- DIY & 3D Printed Options: If you have access to a 3D printer or enjoy a bit of DIY, you can find plans to create your own mount or combine parts from different systems to solve unique fitment issues, like a saddle that’s pushed very far forward.
Before You Buy a Mount, Check:
- Saddle Rail Shape: Do you have standard round rails or oversized oval carbon rails? Most clamps fit both, but it’s always worth checking the product description.
- Saddle Design: Some saddles from brands like Specialized or Bontrager have their own integrated mounting systems that require specific adapters.
Step-by-Step Installation Guide
Let’s get this installed. The process should take less than 10 minutes.
You Will Need:
- Your chosen saddle rail mount
- Your Garmin Varia
- An Allen key or multi-tool
Step 1: Clamp the Mount to Your Saddle Rails
Unscrew the main clamp bolts and position the two halves of the clamp around your saddle rails. Find a spot that is far enough back to provide clearance but still on a straight section of the rails. Tighten the bolts evenly and securely.
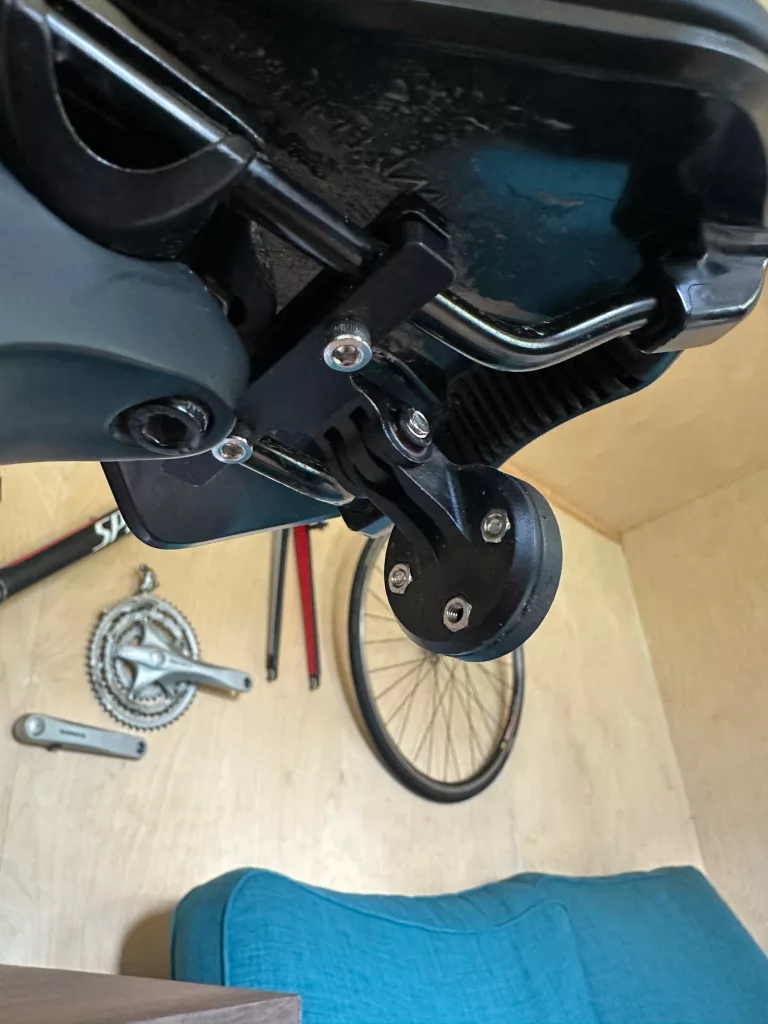
Step 2: Attach the Varia Adapter
Most mounts use a GoPro style fin system to connect the puck to the clamp. This allows you to adjust the vertical angle.
- Slot the Varia adapter into the saddle rail clamp.
- Insert the thumbscrew or bolt and tighten it, but leave it just loose enough to adjust the angle by hand.
Step 3: Mount the Varia and Set the Angle
Click your Garmin Varia into the mount. Now, stand behind your bike and adjust the unit until it is perfectly vertical. This is crucial for the radar to function correctly. Once you’re happy, fully tighten the angle bolt.
Step 4: Final Checks
- Security: Give the whole assembly a firm wiggle. Nothing should move. For extra peace of mind on rough roads, consider adding a drop of blue Loctite to the bolt threads.
- Clearance: Attach your saddle bag and confirm there is at least a finger’s width of space between it and the Varia.
- Safety Leash: The Varia doesn’t have a built-in leash point like an Edge computer, but some riders fashion a small tether from the unit to a saddle rail as a final failsafe.
Ready to upgrade your Varia mount? 👉 Order the same Panmount saddle mount I used from Amazon.
(As an Amazon Associate I earn from qualifying purchases.)
After that, you’re done! You’ve just installed the single best upgrade for your Garmin Varia, giving you a secure, reliable and perfectly positioned setup for thousands of safe miles to come.


